

Maximizing Your Mushroom Yield:
Estimated Biological Efficiency of Various Mushroom Strains
Introduction to Mushroom Yield and Biological Efficiency
Embarking on the journey of mushroom cultivation involves a learning curve that includes understanding mushroom yield and biological efficiency. These parameters are crucial, especially when using a mushroom kit for growing mushrooms such as Lion's Mane.
The Importance of Mushroom Yield
Initially, in your mushroom growing endeavor, your focus may not center on maximizing yield. The excitement of successfully producing a first batch of mushrooms is often satisfaction enough. However, as your expertise deepens and possibly evolves into a business venture, the focus on maximizing mushroom yield becomes paramount.
Understanding Biological Efficiency
Biological efficiency (BE) measures the effectiveness of a specific mushroom strain and substrate combination in mushroom cultivation. Essentially, 100% BE means that 1 kg of fresh mushrooms are harvested from 1 kg of dry substrate over multiple flushes. The BE formula is: BE=(weight of harvest / weight of dry substrate)x100%.
Example of Biological Efficiency with Lion's Mane Mushrooms
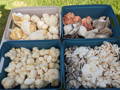
For instance, if you harvest 900g of fresh Lion's Mane mushrooms from a 2.3 kg supplemented sawdust fruiting block from your mushroom kit (comprising 900g of dry substrate and 1.4 kg of water), the BE would be 100% (900g/900g x 100%).
Lion's Mane mushrooms typically have a BE range of 90-140%. Thus, achieving a 100% BE with a 900g harvest from a 900g dry substrate could indicate that your mushroom kit still holds potential for additional mushroom production.
Factors Affecting Mushroom Yield and Efficiency
However, it's vital to remember that actual yield can vary significantly based on numerous factors, including specific growing conditions, substrate quality, and the particular mushroom strain. Consequently, even after achieving a 100% BE, your kit could potentially yield more mushrooms, or it could be completely spent.
Strategies to Boost Mushroom Yield
There are several ways to enhance your mushroom yield:
- Strain Choice: Different strains within the same mushroom species can yield vastly different results. It's advisable to use top-performing commercial strains, which have been developed and optimized over the years for reliable yields.
- Supplementation: This involves adding a nitrogen-rich nutrient to the mushroom substrate, providing a more substantial nutritional base for the mycelium, leading to more robust mycelium and larger, healthier fruits.
- Harvest Timing: Your harvest timing significantly impacts your overall yield and biological efficiency. Picking your mushrooms at the right stage ensures optimal yield without compromising quality.
Estimated Biological Efficiency of Various Mushroom Strains
Mushroom Species
approximate Biological Efficiency (B.E)
Blue Oyster (Pleurotus ostreatus):
B.E.: 100-200%
King Oyster (Pleurotus eryngii):
B.E.: 100-150%
Black King Oyster (Pleurotus ostreatus var. columbinus):
B.E.: 90-140%
Pink Oyster (Pleurotus djamor):
B.E.: 100-170%
Winter White Oyster (Pleurotus ostreatus var. Florida):
B.E.: 120-170%
Yellow Oyster (Pleurotus citrinopileatus):
B.E.: 50-90%
Shiitake (Lentinula edodes):
B.E.: 100-200%
Turkey Tail (Trametes versicolor):
B.E.: 75-125%
Lion's Mane (Hericium erinaceus):
B.E.: 90-140%
Reishi (Ganoderma lucidum):
B.E.: 80-120%
Analogy: Comparing Mushroom Efficiency to Car Fuel Efficiency
Think of mushroom yield efficiency as fuel efficiency in a car. Just like a car uses fuel to travel distances, a mushroom kit uses substrate to produce mushrooms. A small first flush of mushrooms doesn't mean your mushroom kit is inefficient, much like a car that has only traveled a short distance doesn't necessarily have poor fuel efficiency. The remaining substrate in your mushroom kit, like the remaining fuel in a car, can still produce more mushrooms in subsequent flushes, revealing the true efficiency of the mushroom cultivation process.
Conclusion: The Journey Towards Optimizing Mushroom Yield
Understanding and optimizing mushroom yield is a rewarding journey that intertwines science, nature, and a sprinkle of patience. As you master the balance between the choice of strain, supplementation, and perfecting your harvest timing, you're likely to see improvements in your biological efficiency and overall yield.
The data compiled in this guide provides an excellent starting point for comparing the biological efficiency of different mushroom strains. By understanding this, you can choose the right strain for your cultivation conditions and expectations.
Just like a car doesn't reveal its fuel efficiency in the first mile, a mushroom kit may not show its full potential in the first flush. Patience, observation, and experience will guide you to optimize your mushroom cultivation process, leading to satisfying and potentially fruitful results.
Whether you're a hobbyist or aspiring mycologist, the journey of mushroom cultivation is filled with fascinating discoveries and rewarding experiences. With careful attention to each step of the process, you can maximize your mushroom yield and reap the delectable rewards of your labor. Happy growing!